How Do I Connect to a SQL Database Using the Build SQL Schema Method?
In this article, we demonstrate how to connect a Report Template to a SQL database using the Build SQL Schema method. This option is suggested to limit the number of Tables, Views, and Stored Procedures to a subset of those used in template design or because the database is so large that connecting to it directly would make the Report Designer too slow to work with. Microsoft Office 32 bit version has a 2GB memory limitation that can be overwhelmed by extremely large databases.
When Do I Use this Feature?
There are a few cases where using BuildSQLSchema is a better way to connect to a database:
- If you only want to show a subset of the tables and/or columns in the database.
Make sure to delete the ones your template designers will not use from the schema file before using it. (This does not stop template designers from using those tables/columns in a select, it merely does not display them in the tag editor.)
- Hand code the primary key/foreign key joins. Our Report Designer knows a path to join two tables, but it has no way of determining the best path.
- The database does not have complete metadata; it may be missing descriptions or primary key/foreign key joins.
- The database takes a long time to return all the metadata which makes the Report Designer slow and less responsive.
High Level Outline of the Process
- First, build the schema.xml file. In this step, you will enter your connection details and the tool will then write all the schema information out to an XML file.
- After the process completes locate the new XML schema file on your PC and make a backup copy so if during the next step you make a mistake you don’t have to repeat the first step
- Then, open a copy of the schema.xml file and delete any tables, views, stored procedures, or columns that you do not wish to work with. This step is long and painful but once you have finished making your edits then this new schema file will be what you use to connect the template to your data source.
- Finally, you are connected to a subset of a larger database and it is much faster than connecting to the database as a whole. Plus template designers will only see what you have made available to them.
Step 1 – Create Your Schema.xml File
First, from the "Windward Tools" tab click on the "Build SQL Schema" button.

This will bring up the "Build SQL Schema" dialog box below.

Under "Schema File" enter the full path and name for the schema file you wish to build. (It is OK if the file does not exist, this procedure will create it.)
Then, select the database vendor from the Vendor drop-down list. For this example, we will use SQL Server Database.

Once you select the vendor, the dialog box will change to allow you to enter the appropriate information.

You may optionally test the connection. Click "Build Schema" to build the schema file.
You will see the "SQL Schema Status" window (shown below) letting you know when the process is complete.

Once complete, click Close and your schema file is built and ready to use.
Your schema file contains all of the tables in the database you’ve selected to build the file against. Make a backup copy of this file. If during the next step mistakes are made you have a backup copy to work with and don't have to repeat the first step. Now open your schema file in a text editor and start deleting any and all of the unwanted tables, views, stored procedures or even columns within your Tables you don't want to use for template design.
Step 2 – Connect to Your SQL Schema File as a Data Source
Now, connect to the SQL Schema file you’ve just edited. From MS Word, Excel or PowerPoint, navigate to the "Windward" tab. Once on the "Windward" tab, click on the upper half of the "Data Sources" button. This will open the data source "Connection Editor".
Note that if you click on the bottom half, you will get a dropdown menu which lists data sources that are already connected; this may be blank.

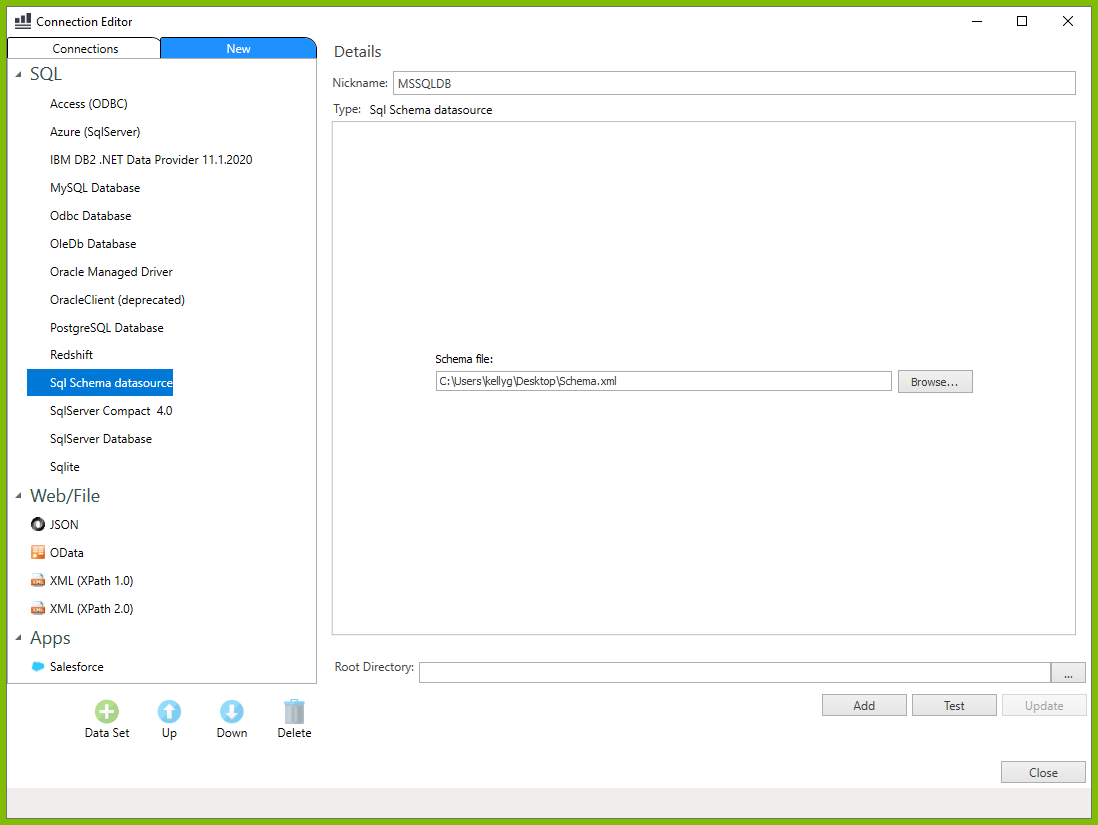
Next, enter the information for the Schema file you just created.
- Click on the "Sql Schema datasource" option in the New tab.
- Create a Nickname for your data source.
- Type in or browse to the schema file you edited.
- Click Connect, and then Test your connection. If all parameters and credentials are correct and a connection is made, you will receive a successful notification. Clicking "Close" will save your information.
0 Comments
Add your comment