Tag Tree Reference
The Tag Tree provides a quick look at the Tag structure of your template. It is also very helpful when navigating to various tags, especially finding beginning and ending Tags. The Tag Tree also shows properties and the value held in the Query Tab of each Tag as well, so you can use it to find errors or offending Tags when trying to generate output.
The Tag Tree Pane
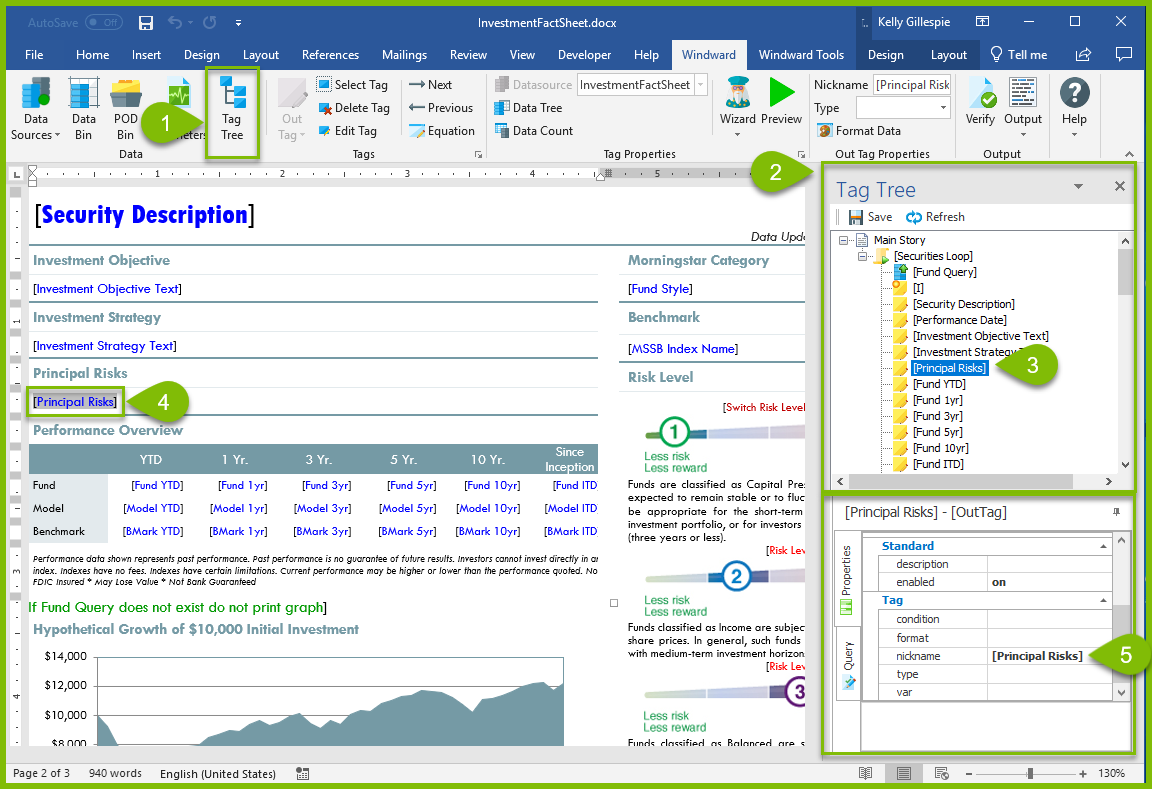
- Click on the “Tag Tree” button in the “Windward” ribbon.
- The “Tag Tree” pane will open.
- Locate any Tag you would like to navigate to in the pane and then double click it
- You will notice that in the body of your template the Tag will be highlighted
- Now that you have selected a Tag you will be able to view both its properties and query tabs in the mini “Tag Editor” pane.
You can click and drag the sides of the panes to make them larger or smaller depending on your needs.
The Tag editor (which is normally an interface that you access from double clicking on a tag, or from selecting via the Windward Ribbon) is provided here for fine-turning or making changes to your Tags. This is especially helpful if your Tags are not acting as expected and you need to edit different Tags quickly while navigating through your tree.
Tag Tree Tips
- Tags are listed in the order that they are inserted unless they are nested Tags.
- Nested Tags will appear as expandable and collapsible nodes.
- Tags in the pane can be identified by their icon (a tiny version of the Tag icon in the dropdown menu for inserting Tags) and the nickname you give them.
- When you select any Tag Tree element, it will display the entire contents of the tag.
- If you double click on any Tag, it will take you to that tag in the document.
- If you select a Tag and delete it directly in Office, the Report Designer will not register that change (unless you refresh). If you copy a Tag and then paste a copy elsewhere the Report Designer does not notice that change (unless you refresh).
- When you double click a Tag in the Tag Tree pane, the Report Designer will try to find that Tag and highlight it. If the Tag position has not changed, it will be successful. If the Tag position has changed, the program will search for the Tag.
- Make sure to click Refresh for updated data after any changes you make.
NOTE: Tags move in the document when you edit the document above the Tag. The location of each Tag is saved as it is offset from the start of the document. So inserting/deleting text, rows, columns, etc changes the actual offset of all Tags beyond that edit.
Tag Tree Schema
In the "Tag Tree" there is a "Save" button. This will save a copy of the Tag Tree to an XML file.
Click the "Save" button, enter a filename, and it will write out the Tag structure to an XML file. The saved XML file is for your use only, the Report Designer does not use the file.

This saves the structure and properties of all the tags in your template. The purpose of this is to provide the structure in an XML format so you can use XML tools to view all of your Tags, including performing queries against the structure to find/view Tags based on the search criteria.
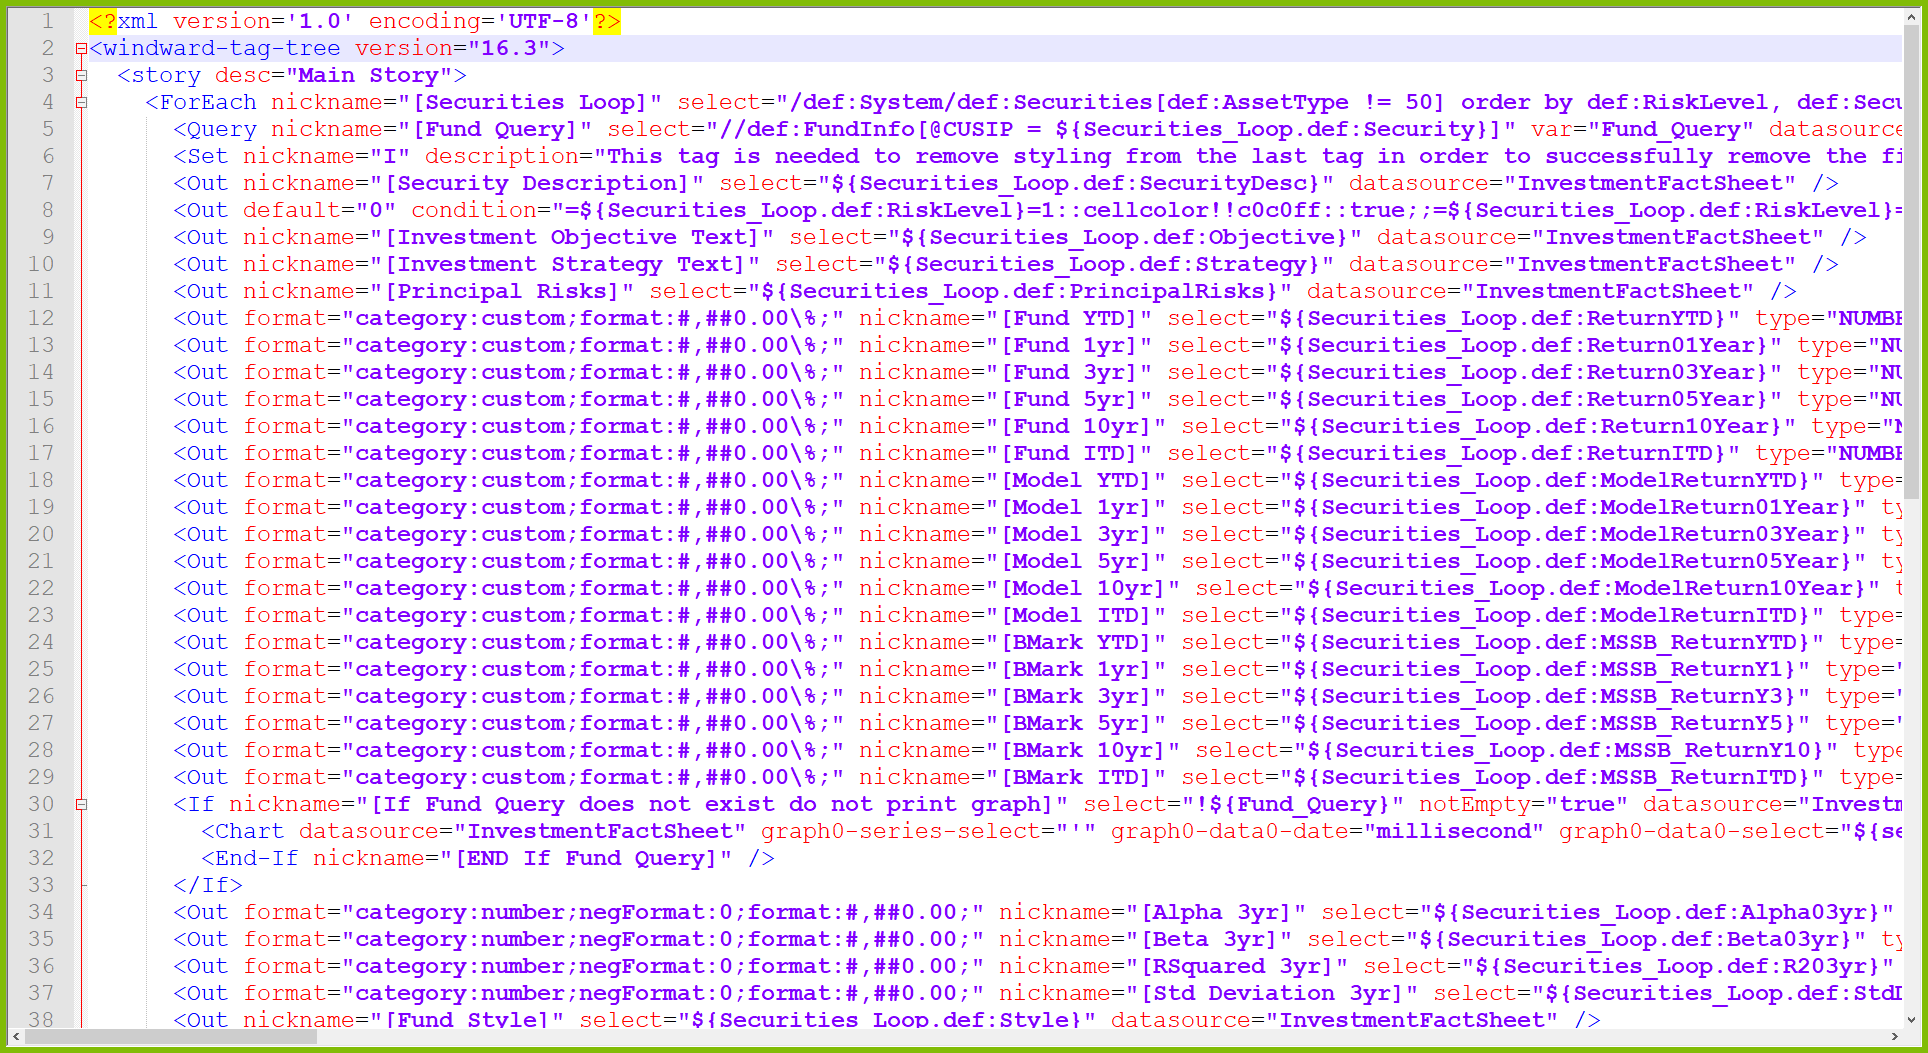
The structure of Tags will then be saved as XML and looks like the following:
The structure of the XML is very simple. There’s the root node, then a node for each element. Inside that there’s a node for every Tag.
- The name of the node is the Tag type name. You have nodes named ForEach, Out, Chart, etc.
- The attributes of each node are the properties for that tag. Every property that has a value will be listed as an attribute.
- Tags that have a start & end Tag, like forEach or If, will have all Tags inside that start/end as child nodes. This gives you the structure of the Tags.
- The end Tag, like EndForEach, is a node in the XML because it is a distinct Tag. But by definition, it should be the last end before the end of the containing node.
Windward does nothing with this XML. It exists solely for the use of the user if they find this information useful.


0 Comments
Add your comment